


To frame a puzzle, start by sorting pieces by color and edge shape. Then, connect edges before filling in the center for a completed picture.
Puzzles offer a fun and challenging way to unwind, stimulate the brain, and enhance problem-solving skills. The process of framing a puzzle requires patience, attention to detail, and strategic thinking. By following a systematic approach, you can efficiently assemble the pieces to reveal the full image.
In this blog post, we will explore the step-by-step process of framing a puzzle and provide useful tips to help you tackle this enjoyable activity with ease. So, let’s dive into the exciting world of puzzle framing and discover the satisfaction of completing a beautiful masterpiece.
Introduction To Puzzle Framing
Discover the art of puzzle framing with our step-by-step guide. Learn how to frame a puzzle and showcase your completed masterpiece with style and precision. Elevate your puzzle game with our expert tips and tricks.
The Joy Of Preserving Puzzles
Puzzles can provide hours of entertainment and a sense of accomplishment once completed. But what happens when you finish a puzzle and want to preserve it as a memory? That’s where puzzle framing comes in. Framing a puzzle allows you to showcase your hard work and creativity while protecting it from damage. Not only does it serve as a decorative piece, but it also reminds you of the joy and satisfaction you experienced while solving the puzzle.
Benefits Of Framing Your Puzzle
There are several benefits to framing your puzzle, making it a worthwhile endeavor for puzzle enthusiasts. Here are some key advantages:
- Preservation: By framing your puzzle, you can protect it from dust, moisture, and potential damage. The frame acts as a barrier, keeping your puzzle intact for years to come.
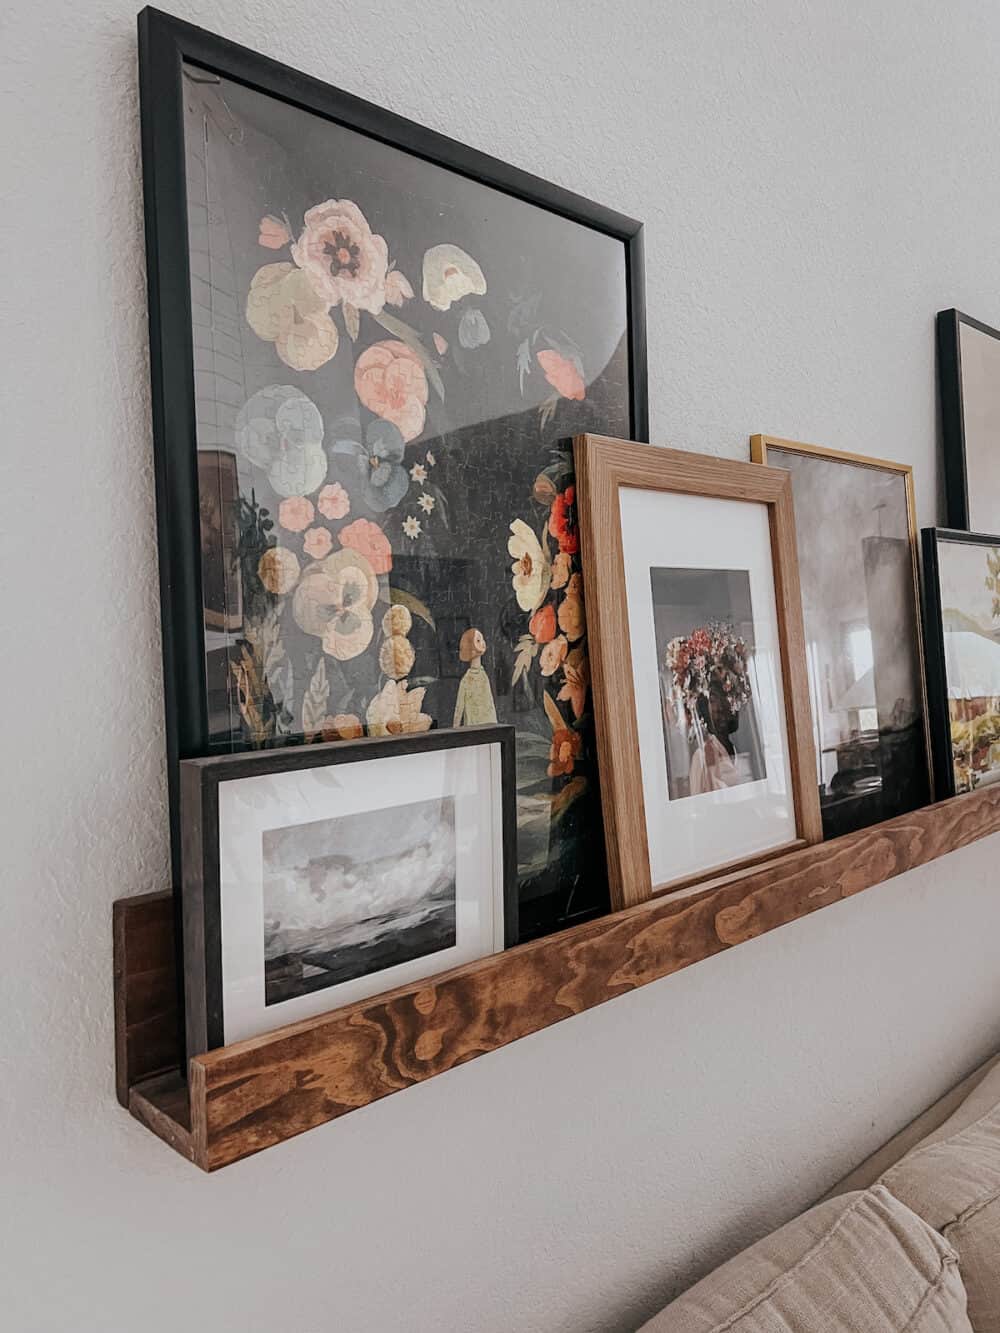
- Display: Framing your puzzle allows you to proudly exhibit your accomplishment. Whether it’s a beautiful landscape, a challenging abstract design, or a nostalgic scene, a framed puzzle can be a captivating addition to your home decor.
- Personalization: With puzzle framing, you have the opportunity to customize the display according to your preferences. You can choose from various frame styles, colors, and sizes to complement the puzzle’s theme and fit your desired aesthetic.
- Conversation Starter: A framed puzzle can spark interesting conversations with friends and family. It serves as a unique focal point, inviting others to admire your dedication and skills in completing the puzzle.
- Memories: Framing a puzzle preserves the memories associated with solving it. Each time you see the framed puzzle, you can relive the sense of achievement and the joy you felt during the process.
Now that we’ve explored the joy of preserving puzzles and the benefits of framing them, let’s dive deeper into the process of how to frame a puzzle.
Choosing The Right Puzzle To Frame
When framing a puzzle, it’s important to choose the right type of puzzle to ensure a perfect fit. Consider the size, shape, and design of the puzzle to select a suitable frame that enhances its visual appeal and preserves its integrity.
Pay attention to the dimensions and complexity of the puzzle to make the right framing choice.
Framing a puzzle is a great way to preserve it and showcase it as a piece of art. However, not all puzzles are created equal when it comes to framing. Before you start framing your puzzle, you need to make sure that you have chosen the right puzzle to frame. Here are some considerations to keep in mind when selecting the perfect puzzle for framing.
Selecting The Perfect Puzzle
When choosing a puzzle to frame, you want to make sure that it is a puzzle that you truly love. It should be a puzzle that you are proud of completing and that you want to display in your home. Here are some other things to consider when selecting the perfect puzzle:
- Size: The size of the puzzle is an important consideration when it comes to framing. You want to make sure that the puzzle will fit in the frame that you have chosen.
- Complexity: The complexity of the puzzle is also important. A puzzle with a lot of small pieces may not be the best choice for framing, as it will be difficult to see the details once it is framed.
- Subject matter: The subject matter of the puzzle is another consideration. You want to choose a puzzle that has a subject that you enjoy and that will look good on your wall.
- Quality: Finally, you want to make sure that you have chosen a high-quality puzzle. A puzzle with a lot of missing pieces or that is falling apart will not look good when it is framed.
Considerations For Framing
Once you have chosen the perfect puzzle to frame, there are some considerations to keep in mind when it comes to framing. Here are some things to consider:
- Frame size: The frame size should be slightly larger than the puzzle to allow for some margin.
- Matting: Matting can help to enhance the appearance of the puzzle and provide some space between the puzzle and the frame.
- Backing: The backing should be acid-free to prevent damage to the puzzle over time.
- Glass: You can choose between regular, non-reflective, or UV-protective glass depending on the location of the framed puzzle.
- Hanging hardware: Make sure to choose the right hanging hardware based on the weight of the framed puzzle.
By considering these factors, you can choose the perfect puzzle to frame and ensure that it looks great on your wall for years to come.
Materials Needed For Puzzle Framing
When it comes to preserving and displaying your completed puzzles, framing is an excellent option. Not only does it protect your puzzle from damage, but it also allows you to showcase your hard work and creativity. To successfully frame a puzzle, you will need a few essential supplies as well as some optional enhancements to elevate the overall presentation. Let’s dive into the materials needed for puzzle framing.
Essential Supplies
Before you begin framing your puzzle, make sure you have these essential supplies on hand:
- Frame: Choose a frame that fits the dimensions of your puzzle. Opt for a frame with a glass or acrylic front to protect the puzzle.
- Mat Board: A mat board adds a professional touch to your framed puzzle. It not only enhances the visual appeal but also provides a buffer between the puzzle and the frame.
- Mounting Tape: Use mounting tape to secure the puzzle to the mat board. This will prevent any shifting or movement within the frame.
- Gloves: Wearing gloves while handling the puzzle and its components will help avoid fingerprints or smudges on the surface.
- Scissors or Craft Knife: These tools come in handy when trimming the mat board or cutting the mounting tape to the required size.
Optional Enhancements
If you want to take your puzzle framing to the next level, consider these optional enhancements:
- Backing Board: A backing board provides additional support and stability to the framed puzzle. It also helps prevent dust and debris from entering the frame.
- UV-Protective Glass: If you want to safeguard your puzzle from harmful UV rays, opt for UV-protective glass. This glass prevents fading and discoloration caused by prolonged exposure to sunlight.
- Frame Spacer: A frame spacer creates a gap between the puzzle and the glass, preventing any contact or pressure that could damage the puzzle’s surface.
- Decorative Elements: To add a personal touch, consider incorporating decorative elements such as stickers, labels, or themed embellishments that complement the puzzle’s design.
By gathering these essential supplies and considering optional enhancements, you’ll be well-equipped to frame your puzzle and create a stunning display piece that showcases your achievement. Whether you choose to keep it for yourself or give it as a thoughtful gift, a framed puzzle is sure to be a cherished keepsake for years to come.
Preparing The Puzzle For Framing
Preparing the Puzzle for Framing is a crucial step to ensure that your completed puzzle remains intact and looks visually appealing once it’s framed. Before you start the framing process, it’s essential to take the necessary steps to secure the puzzle pieces and strategize its completion to prevent any damage or loss of pieces.
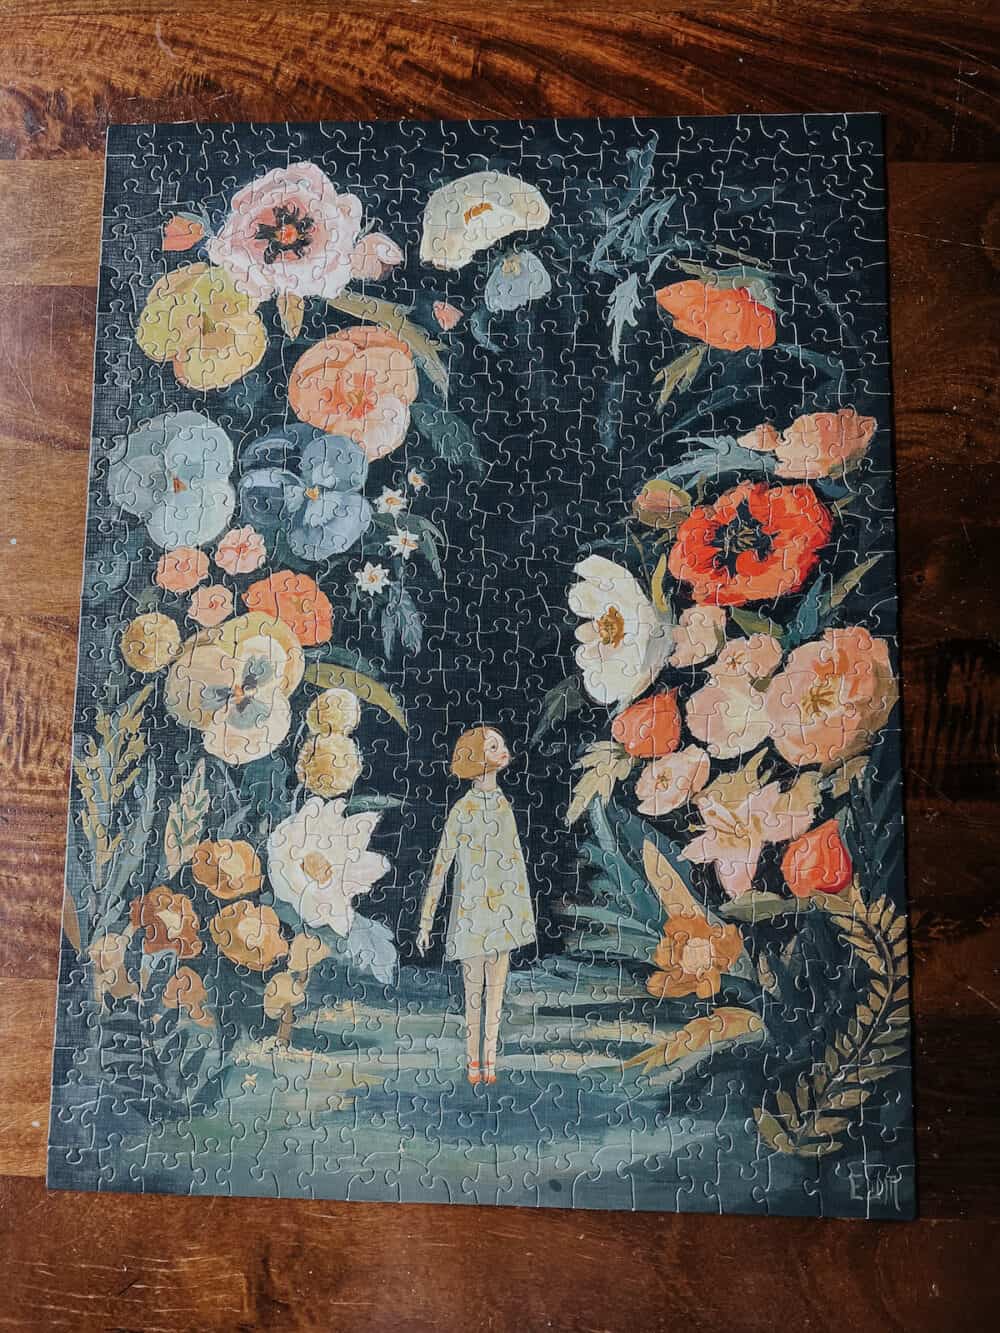
Puzzle Completion Strategies
When completing a puzzle, it’s helpful to start by sorting the pieces by color and edge type to make the process more manageable. Begin with the border pieces and work your way towards the center, focusing on distinct patterns and colors within the image.
Securing The Puzzle Pieces
Once the puzzle is completed, it’s important to secure the pieces in place to prevent any shifting or accidental disarray. One effective method is to carefully slide a large piece of wax paper or parchment paper underneath the completed puzzle. Gently flip the puzzle over and apply a thin layer of puzzle glue to the back surface, ensuring that each piece is coated evenly to create a secure bond. Allow the glue to dry completely before proceeding with the framing process.
Mounting The Puzzle
Once you have successfully completed a puzzle, you may want to showcase your accomplishment by mounting it. Mounting a puzzle not only preserves it but also allows you to display it as a piece of art. In this section, we will guide you on how to mount your puzzle, from choosing the right mounting surface to using adhesive techniques.
Choosing A Mounting Surface
When it comes to choosing a mounting surface for your puzzle, there are several options to consider. Here are a few popular choices:
- Backing boards: These sturdy boards provide a flat surface for mounting your puzzle. They are available in various sizes and can be easily found in art supply stores.
- Foam boards: Lightweight and easy to handle, foam boards offer excellent support for your puzzle. They are also available in different thicknesses and can be cut to your desired size.
- Wooden boards: If you prefer a more rustic look, wooden boards can be a great option. They provide a solid backing and can be customized with different finishes.
Consider the size and weight of your puzzle when choosing a mounting surface. Ensure that it is large enough to accommodate your puzzle and sturdy enough to hold its weight.
Adhesive Techniques
Once you have chosen the perfect mounting surface, it’s time to adhere your puzzle to it. Here are some adhesive techniques to consider:
- Puzzle glue: Puzzle glue is specifically designed for securing puzzles. It comes in liquid form and can be applied using a brush or spreader. Ensure that you apply an even layer of glue to the entire puzzle surface.
- Double-sided tape: If you prefer a quicker and mess-free option, double-sided tape can be a convenient choice. Apply strips of tape to the back of your puzzle and carefully press it onto the mounting surface.
- Adhesive sheets: Adhesive sheets provide a hassle-free way to mount your puzzle. Simply peel off the backing and stick the adhesive sheet to the back of your puzzle. Then, press it onto the mounting surface.
Whichever adhesive technique you choose, make sure to follow the instructions provided with the product. Allow the adhesive to dry completely before moving or hanging your mounted puzzle.
By carefully choosing a mounting surface and using the right adhesive technique, you can proudly display your completed puzzle for everyone to admire. Remember to handle the puzzle with care throughout the mounting process to avoid any damage. Now that you know how to mount a puzzle, it’s time to showcase your puzzle-solving skills!
Selecting The Frame
When it comes to framing a puzzle, selecting the right frame is crucial to showcase your completed masterpiece. The frame not only enhances the aesthetic appeal of the puzzle but also protects it from dust and damage. Here’s how you can choose the perfect frame for your puzzle.
Types Of Frames
Before selecting a frame, consider the different types available. Wooden frames offer a classic look, while metal frames provide a modern touch. Shadow box frames are ideal for 3D puzzles, and acrylic frames are lightweight and shatter-resistant.
Measuring For The Perfect Fit
To ensure the frame fits your puzzle perfectly, measure its dimensions accurately. Use a tape measure to determine the length and width of the completed puzzle. This will help you select a frame that complements the size of the puzzle without leaving too much empty space.
Framing The Mounted Puzzle
Mounting and framing puzzles is a popular way to preserve and display your completed masterpiece. Learn how to frame a puzzle with these simple steps to showcase your hard work and creativity.
Step-by-step Framing Process
Troubleshooting Common Issues
Framing the Mounted Puzzle When framing a mounted puzzle, follow these steps: 1. Prepare the Frame: Choose a suitable frame size and style. 2. Mount the Puzzle: Carefully attach the mounted puzzle to the frame backing. 3. Secure the Puzzle: Use puzzle glue or adhesive to secure the pieces in place. 4. Add the Frame: Place the frame over the mounted puzzle and secure it. 5. Hang or Display: Decide where to hang or display your framed puzzle.
Step-by-step Framing Process
– Prepare the Frame: Choose a frame that complements your puzzle size. – Mount the Puzzle: Attach the puzzle to the backing board securely. – Secure the Puzzle: Apply adhesive to keep the puzzle intact. – Add the Frame: Carefully insert the puzzle into the frame. – Hang or Display: Find the perfect spot to showcase your framed puzzle.
Troubleshooting Common Issues
If you encounter issues: – Pieces Not Fitting: Ensure the puzzle is mounted correctly before framing. – Uneven Alignment: Adjust the puzzle within the frame for proper alignment. – Glue Marks: Use a damp cloth to gently remove excess glue. – Frame Damage: Handle the frame carefully to prevent damage to the puzzle.

Credit: www.levelframes.com
Displaying The Framed Puzzle
When it comes to displaying the framed puzzle, there are key factors to consider.
Choosing The Right Location
Select a spot with good lighting and minimal exposure to direct sunlight.
Hanging And Care
Use proper hanging materials to secure the frame safely.
Advanced Framing Techniques
Double-sided Framing
For a unique display, consider using double-sided framing to showcase both sides of the puzzle.
Adding A Mat Border
Enhance the puzzle’s appearance by adding a mat border to create a professional and polished look.
Credit: www.loveandrenovations.com
Tips For Longevity
Framing a puzzle can be a fun and rewarding way to display your hard work. To ensure longevity of the finished product, it’s important to use acid-free materials, handle the puzzle with care, and choose a sturdy frame.
Tips for Longevity: UV Protection: UV rays can damage puzzles. Store them away from sunlight. Maintenance Advice: Handle puzzles gently to prevent pieces from bending or tearing.
Creative Alternatives To Traditional Framing
When it comes to framing a puzzle, there are creative alternatives to traditional framing that can add a unique touch to your finished piece. From DIY frame ideas to repurposing old frames, there are plenty of inventive options to consider. Let’s explore some of these creative alternatives below:
Diy Frame Ideas
Creating a DIY frame for your puzzle is a fun and budget-friendly way to showcase your completed masterpiece. You can use simple materials like cardboard, foam board, or even popsicle sticks to craft a custom frame that perfectly fits your puzzle. This hands-on approach allows for complete customization and gives you the opportunity to add a personal touch to your display. Consider decorating the frame with paint, glitter, or other embellishments to make it truly one-of-a-kind.
Repurposing Old Frames
Repurposing old frames is another creative option for framing your puzzle. Instead of purchasing a new frame, take a look around your home or visit a thrift store to find a frame that can be given new life. You might come across a vintage frame with intricate detailing or a unique shape that adds character to your puzzle display. With a fresh coat of paint or some minor repairs, an old frame can become the perfect setting for your completed puzzle.
Credit: www.loveandrenovations.com
Frequently Asked Questions
How To Frame A Puzzle?
To frame a puzzle, first, ensure all pieces are connected. Then, use puzzle glue to secure the pieces onto a backing board. After drying, place the puzzle inside a frame and secure it. Finally, add a hanger to display the framed puzzle.
What Is The Best Way To Glue A Puzzle?
The best way to glue a puzzle is by applying the glue evenly over the completed puzzle surface. Use a spreader tool to ensure an even coat. Allow the glue to dry completely before moving the puzzle. This will ensure that all pieces are securely attached.
What Type Of Glue Should I Use For Framing A Puzzle?
For framing a puzzle, it’s best to use puzzle glue or jigsaw puzzle conserver. This type of glue is specifically designed for puzzles and ensures that the pieces are securely attached to the backing board, allowing for long-term preservation and display.
How To Prevent Bubbles When Gluing A Puzzle?
To prevent bubbles when gluing a puzzle, carefully apply the glue in a smooth, even layer using a spreader tool. Work in small sections to ensure that the glue is evenly distributed, and any excess glue is removed. This will help prevent bubbles from forming under the puzzle surface.
Conclusion
Framing a puzzle can be a great way to showcase your hard work and creativity while also preserving it for years to come. With the right tools and techniques, anyone can frame a puzzle and create a beautiful piece of art.
Remember to take your time, be patient, and follow the steps carefully to ensure a successful result. Whether you choose to display your puzzle at home or give it as a gift, framing it can be a rewarding and enjoyable experience.